The holidays have a way of turning every home into something a little warmer and more inviting. Lights go up, wreaths appear on doors, and families start creating moments that feel special. If you have interior shutters, you already have a beautiful architectural backdrop that can make your holiday decorating even more magical.
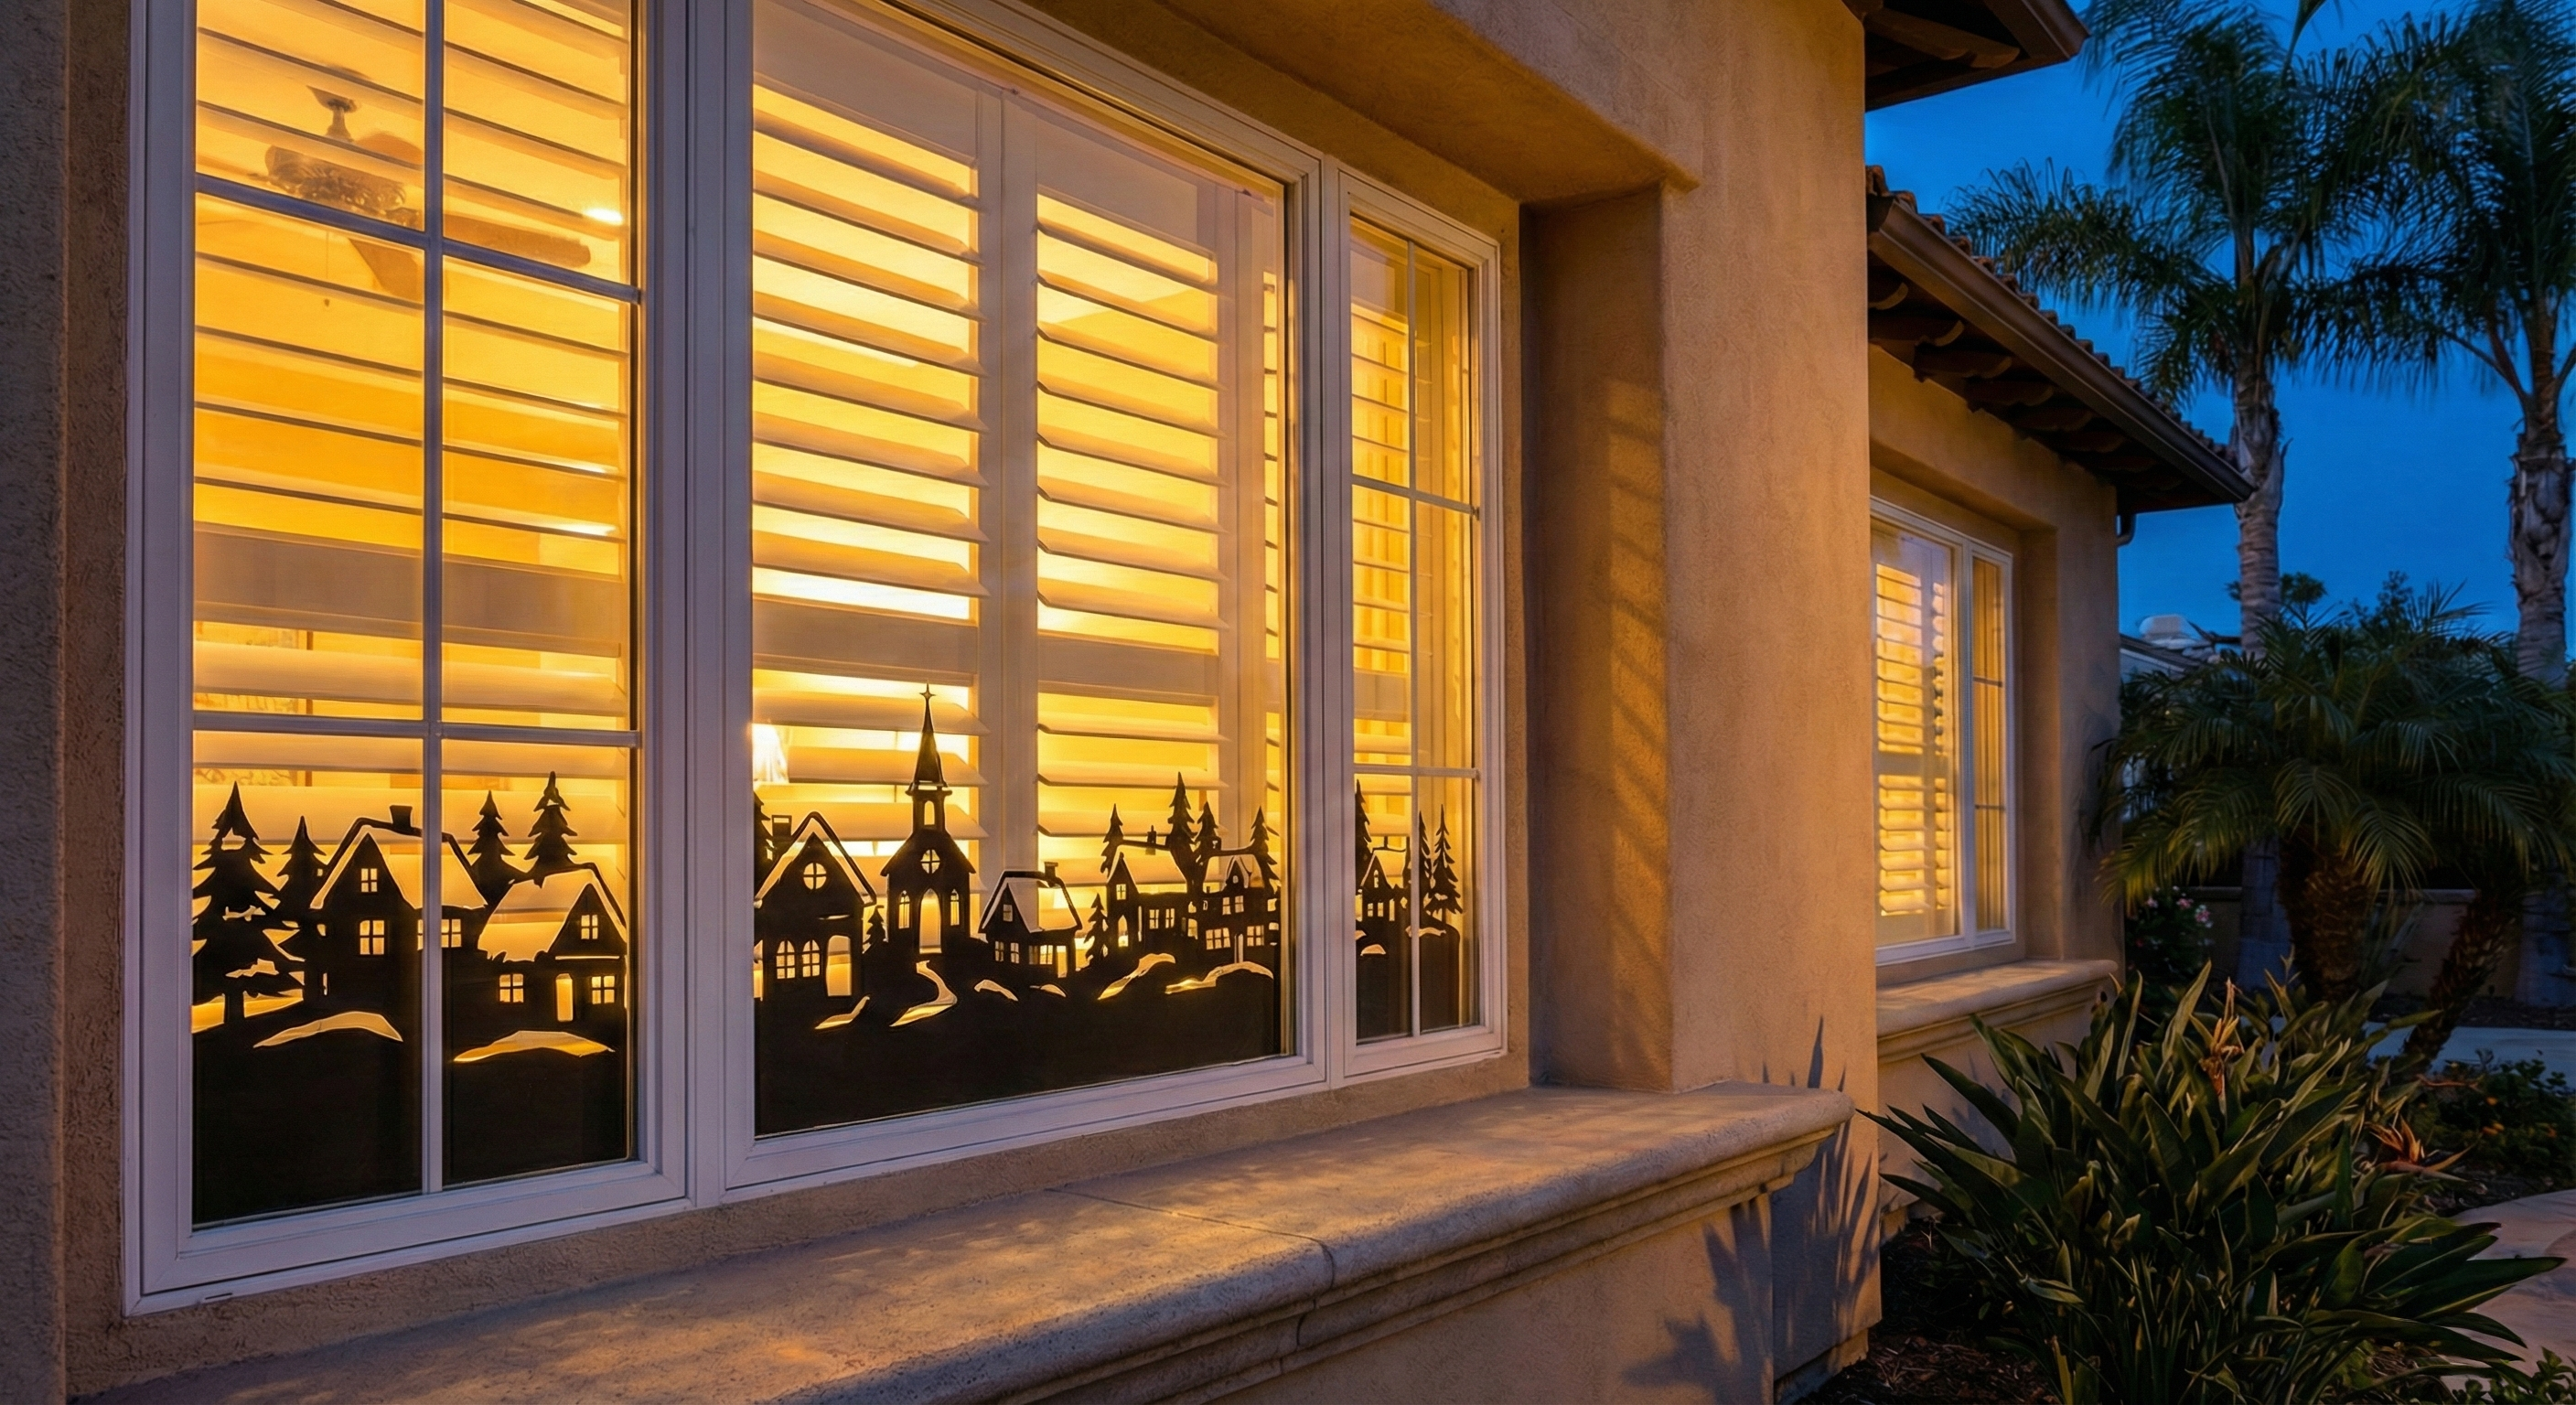
One of our favorite ideas is creating window shutter silhouette scenes. They glow softly at night, feel nostalgic, and add depth behind your shutters that simple window clings cannot match. The effect is subtle and enchanting, almost like a favorite storybook scene playing out inside your home.
Here is an updated, easier, more creative guide to making your own shutter silhouettes for the holidays.
What You Will Need
-
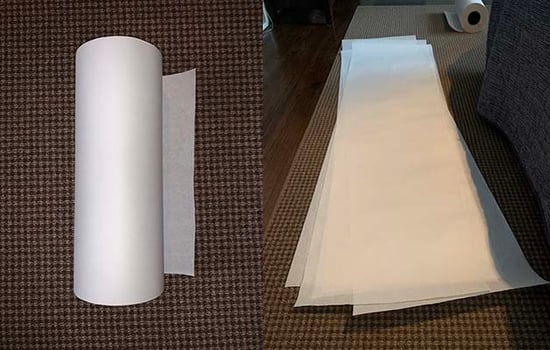
White paper or lightweight white fabric
- Black acrylic paint
- Pencil
- Tape measure
- Scissors
- Painter’s tape or Command Strips
- Scotch tape
- Holiday silhouette images for inspiration
- Printer (optional)
Paper rolls from art stores work well for most shutter sizes. Lightweight fabric is a great alternative if you prefer one seamless panel or want a more durable base.
Step One: Measure Your Shutters
 Measure the open area where the louvers are located. This is the space your silhouette will cover. Add a couple of extra inches at the top and bottom so you have room to secure your material without blocking louver movement.
A helpful tip. Attach the material directly to the shutter panels rather than the surrounding wall. This makes it easier to open the louvers or swing the shutters open without dismantling the entire display.
Step Two: Cut and Test Your Material
Cut one piece per shutter panel. Longer is better at first since you can trim cleanly once it is mounted. Tape your paper or fabric to the panel to test the fit. Make sure:
- It covers the entire visible louver area.
- It has enough slack so the louvers can still open.
- It does not interfere with any tilt rods or divider rails.
If you use one large piece of fabric for the entire window, be aware that you will not be able to open the shutters until the display is removed. Two separate pieces give you flexibility.
 Step Three: Prep Your Design
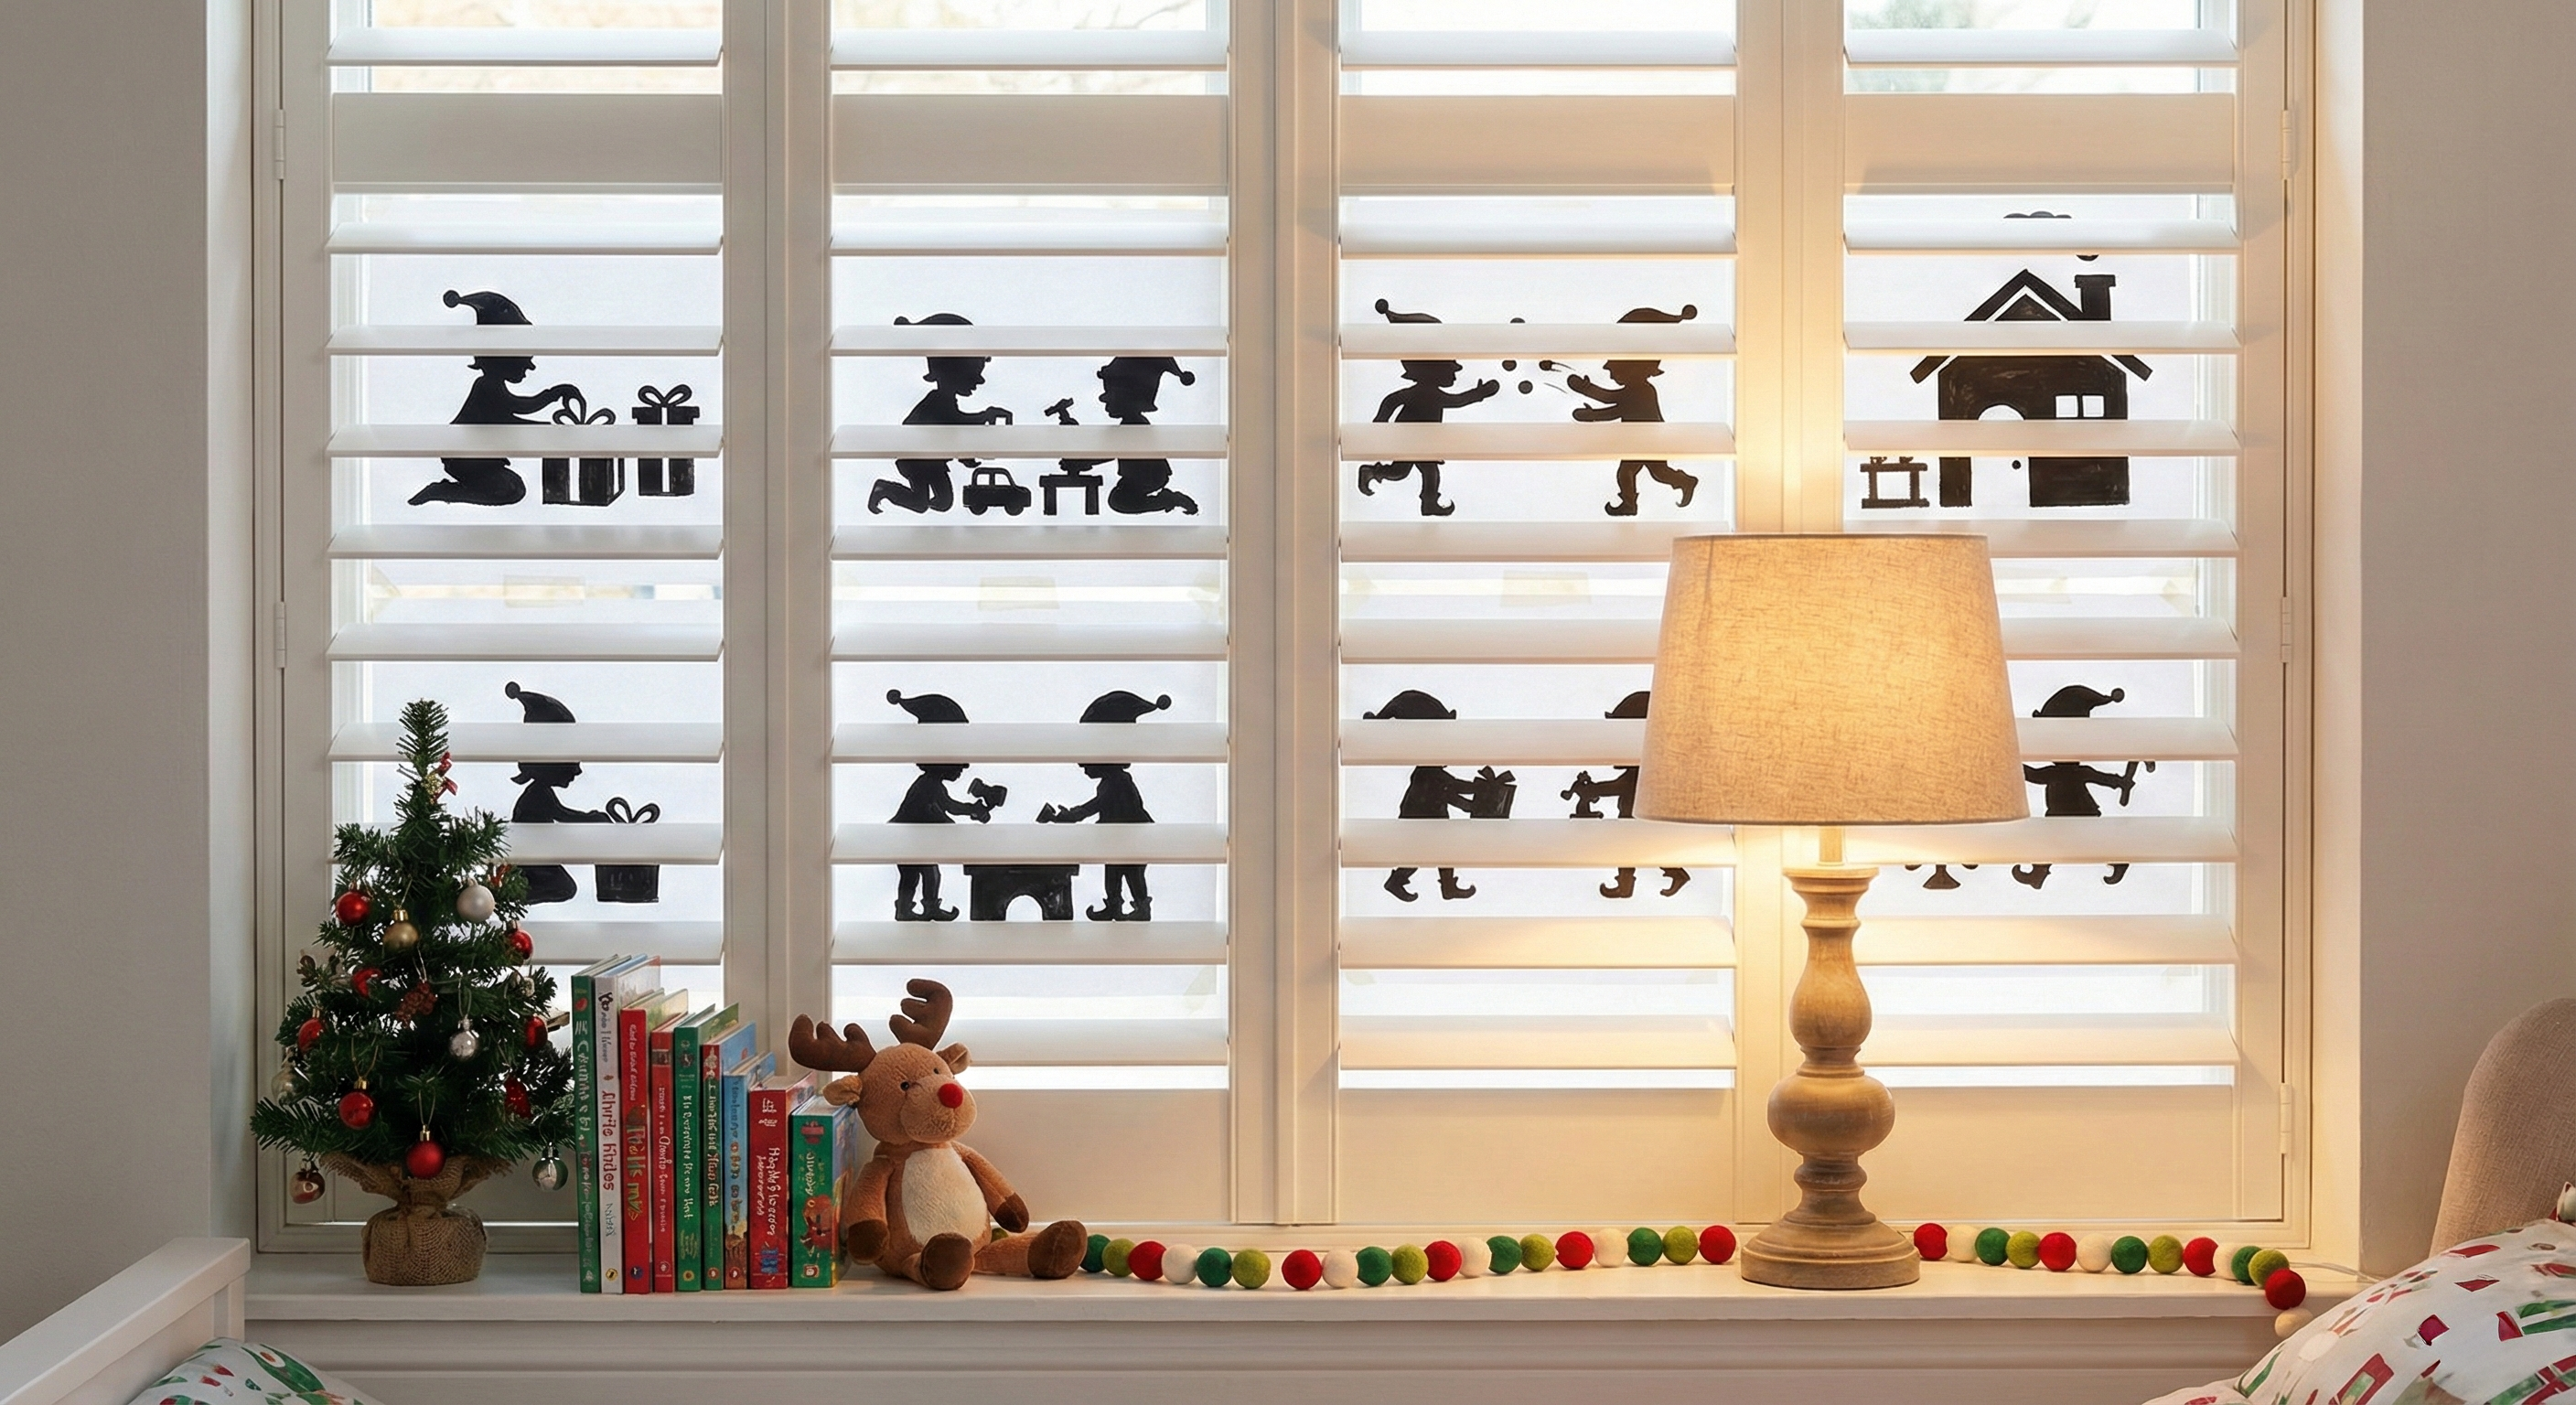
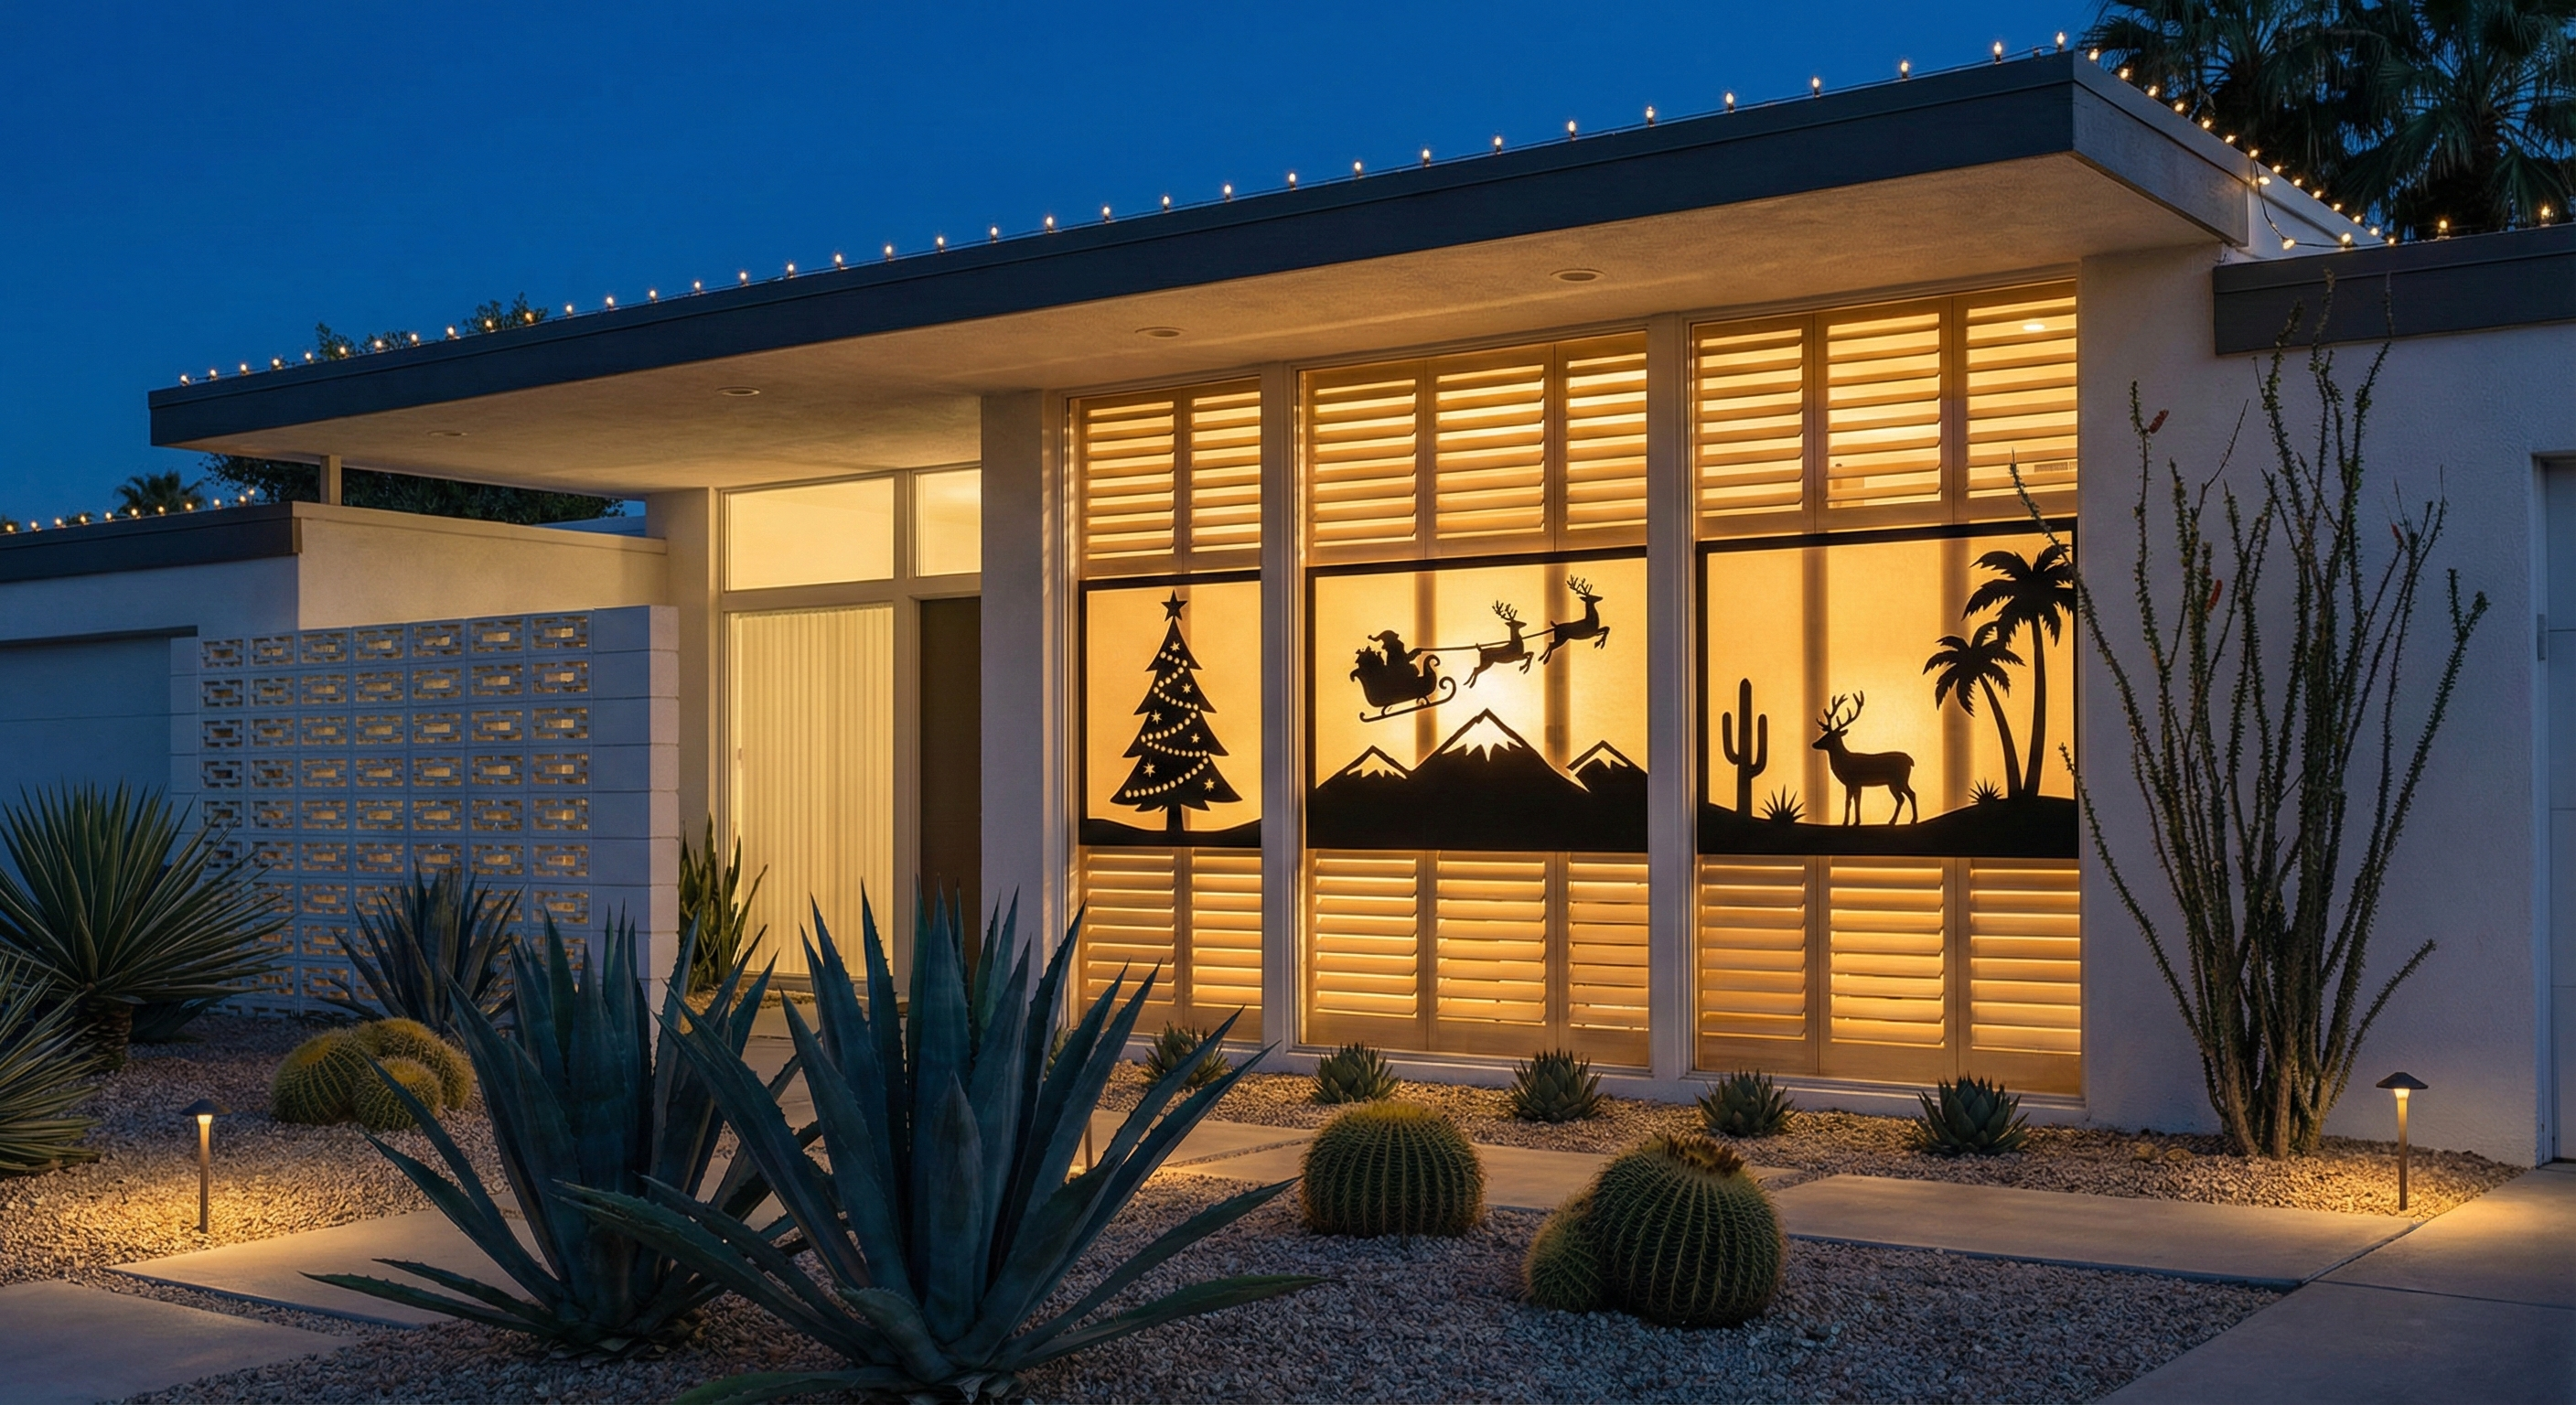
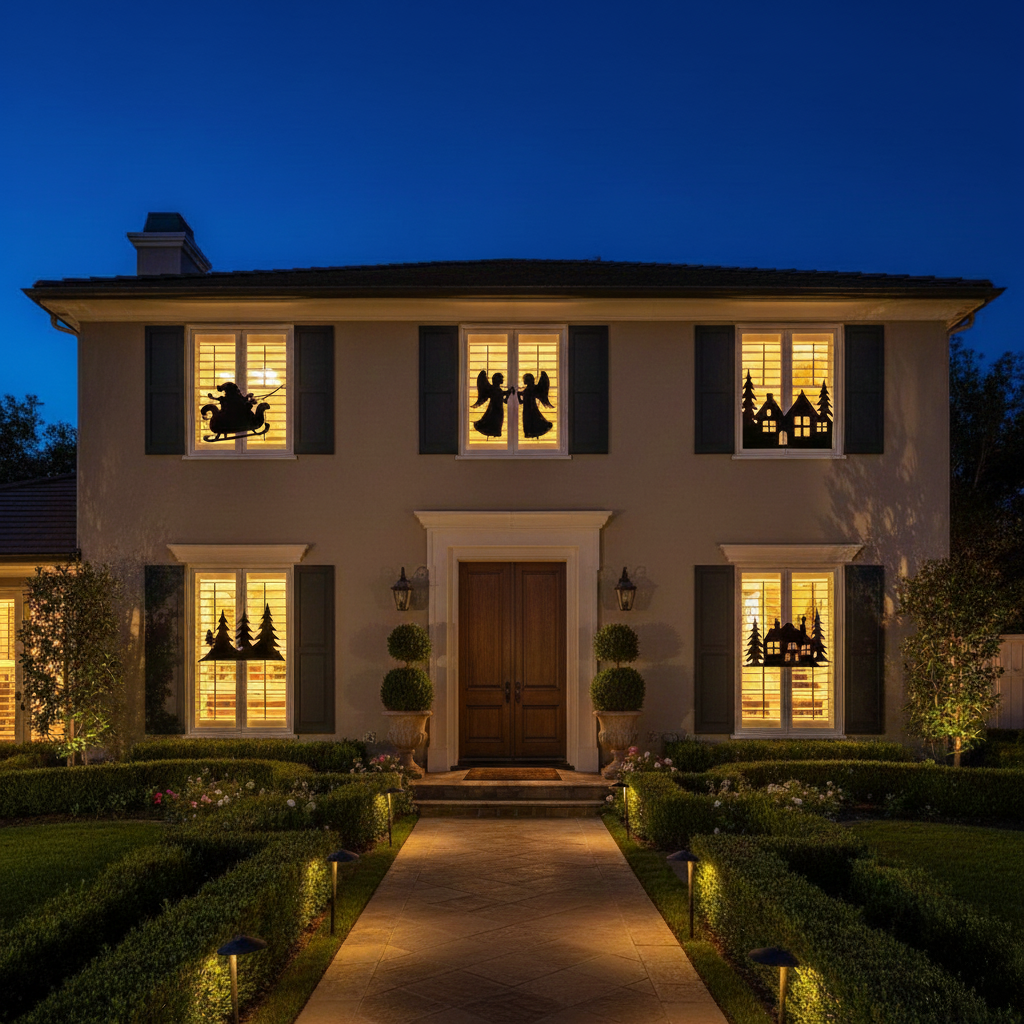
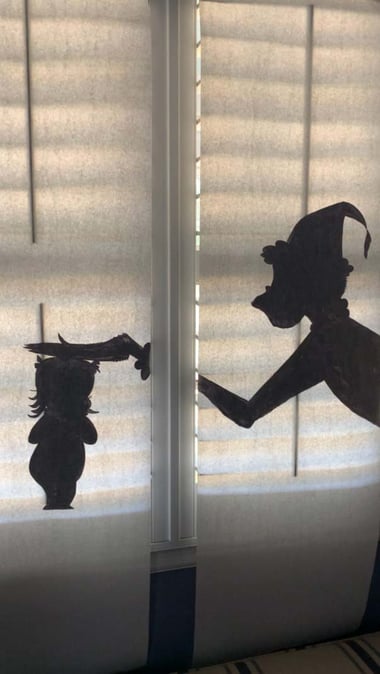
Choose a holiday silhouette that will be recognizable from outside. Good options include:
- Santa carrying a sack
- Reindeer
- Snowy village scenes
- Children ice skating
- Menorah or dreidel silhouettes
- Christmas trees with gifts
- Angels or classic winter motifs
You can:
- Freehand it using your inspiration image
- Print a small reference image and sketch it larger
- Enlarge a picture digitally, print it in tiled pages, tape them together, and cut out a full-size template
If you want ready-to-go designs, you can download printable holiday silhouette templates from our design library. Before painting, tape your outline to the shutter again. Make sure important shapes are not blocked by the tilt rod or divider rail.

Step Four: Paint Your Silhouette
Move to a large flat surface and protect it with a drop cloth. Use black acrylic paint for paper. For fabric, test a corner first to make sure the paint does not bleed. Fill in your entire outline. Solid black works best because it creates a crisp silhouette once the light shines through.
Let everything dry completely before mounting.
 Step Five: Mount and Light Your Scene
With the painted side facing the window, attach your silhouette panels to the shutters using painter’s tape or Command Strips. Open the louvers so your scene is clearly visible from outside. Turn on the room lights, step outdoors, and enjoy the effect.
Once the sun sets, your silhouette will glow beautifully behind the shutters. Because the image sits behind the louvers rather than on the glass, the shadows feel deeper and more dimensional. The entire scene looks like it is unfolding inside your home rather than stuck onto the windowpane.
Make It Your Own
You can create:
- Santa arriving on Christmas Eve
- A Hanukkah silhouette carrying warm candlelight
- Peaceful winter forest scenes
- Nativity or classic holiday story silhouettes
- Playful scenes for kids with elves, toy trains, and woodland creatures
It is a great holiday craft for families and a beautiful way to bring personality to your home. If you try this project, we would love to see it. Share your photos with us on Instagram, Facebook, or Pinterest and tag us so we can celebrate your creativity.